
These instructions will help you to install and configure the Microsoft SQL Server instance for the Cogitate software.
If you need to download a copy of Microsoft SQL Server 2017 Express Edition, please go to the Microsoft SQL Server Download Center and choose the appropriate version of Microsoft SQL Server 2017.
For a 64-bit computer, we recommend the 64 bit Microsoft SQL Server 2017.
Once the install is downloaded, open the install package and the SQL Server Installation Center should start.
–Important: Prior to installing Microsoft SQL Server 2017, make sure that the Microsoft SQL Native Client 2012 is NOT installed. Also make sure that the Microsoft Visual C++ Runtime 2005 is NOT installed. Make sure to uninstall both the 64 bit and 32 bit versions.
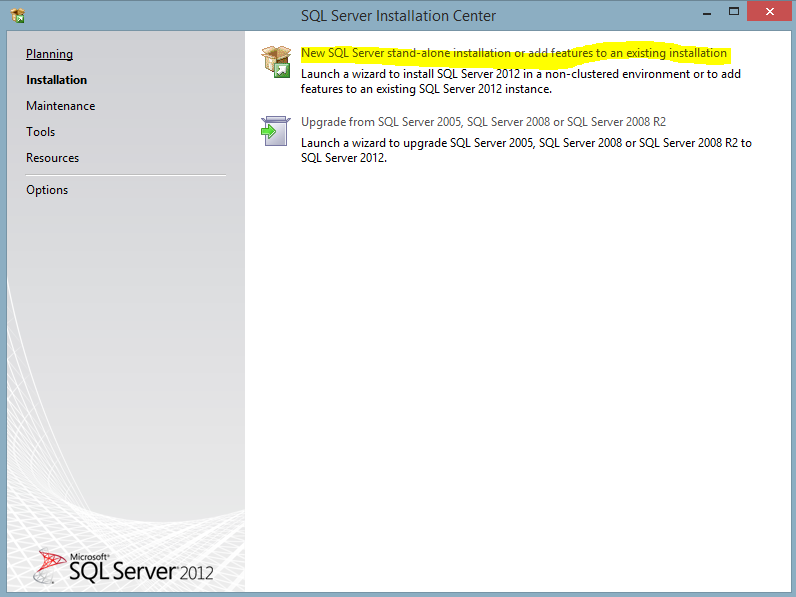
Click on the New SQL Server stand-alone installation or add features to an existing installation link.
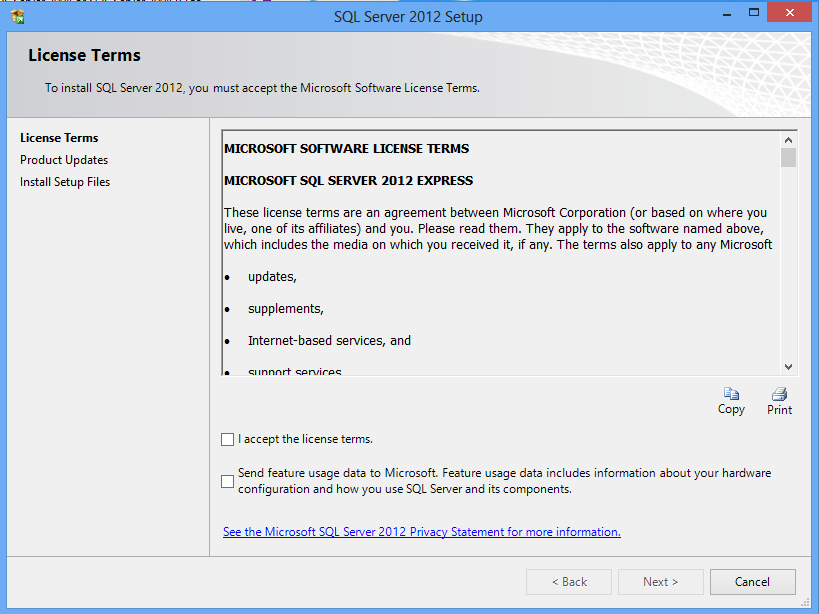
Check the box to accept the Microsoft License Agreement and then click on Next.
If you have a fast Internet connection, then leave the Include SQL Server product updates checkbox checked. Otherwise you can uncheck this checkbox.
–Note: If you experience any issues during the install process, try restarting the install and unchecking this box.
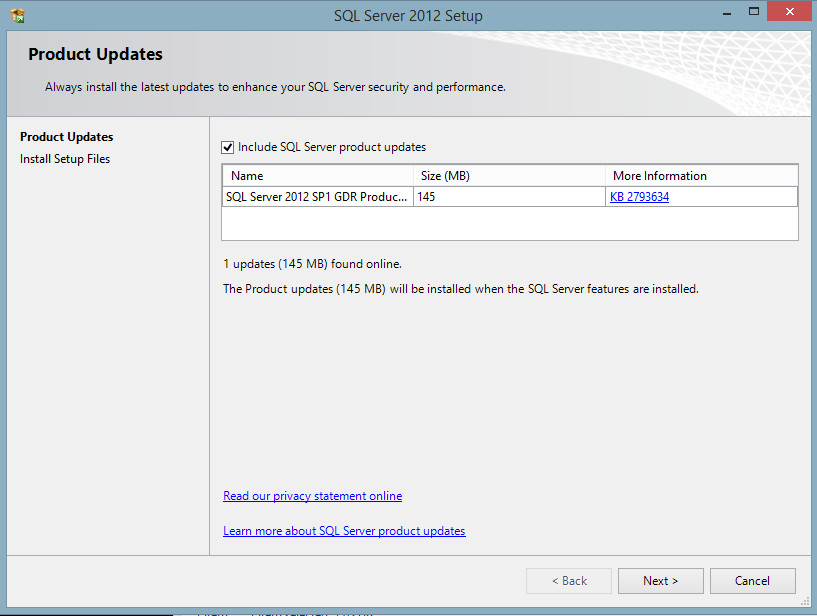
Click Next to continue.

The features that are checked are the only necessary features to install for this instance of Microsoft SQL Server 2012.
If the server has enough disk space free on the C: drive then it is recommended to leave the default locations alone.
Otherwise, you can the location of each of the selected features.
Click Next to continue.
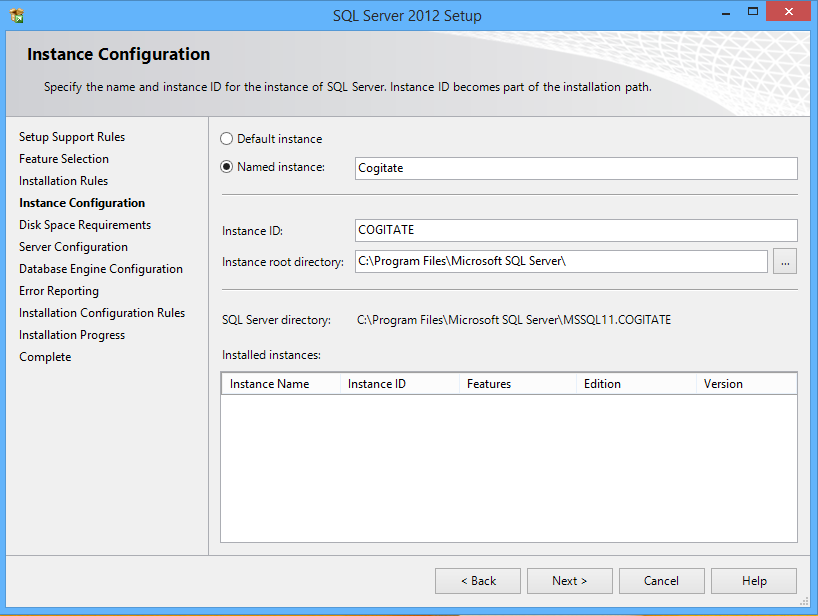
Make sure you select the Named Instance option and use Cogitate as the instance name.
If the server has enough disk space free on the C: drive then it is recommended to leave the default location alone. Otherwise, you can the location of instance root directory.
Click Next to continue.
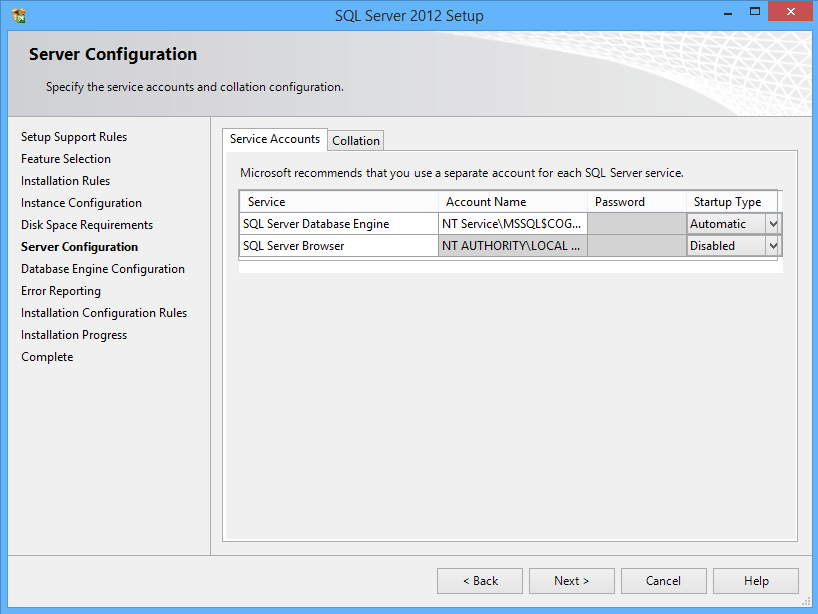
Leave everything set to the defaults on this screen.
Click Next to continue.
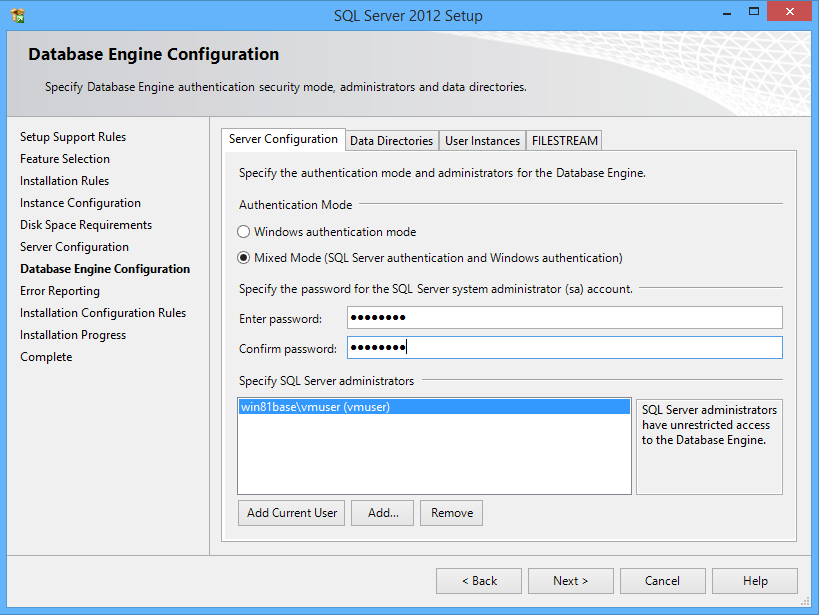
It is very important to make sure that the Mixed Mode option is selected. The recommended password is Cogito1!
Click Next to continue.
Click Next to continue. This will start the Microsoft SQL Server 2017 installation process. When the install is finished, click on the Close button to exit the install. Please make sure to complete each of the post installation steps.
Post Installation steps:
Let’s configure the Cogitate instance of Microsoft SQL Server 2017 now:
Go to the start menu and find the SQL Server Configuration Manager shortcut. Click on the shortcut to run the SQL Server Configuration Manager.
Click the plus next to the SQL Server Network Configuration option and select the Protocols for Cogitate option.
Then right click on the TCP/IP option and choose Enable.
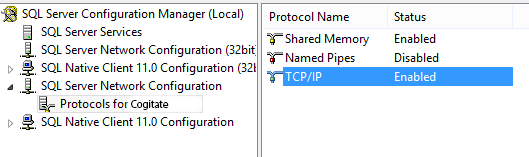
Once the TCP/IP option shows Enabled, right click on the TCP/IP option again and choose Properties.
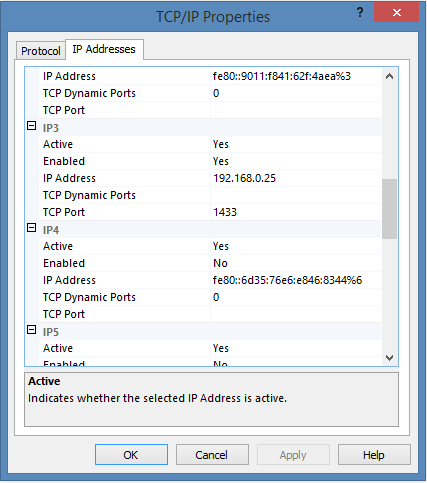
Find all of the IP Version 4 addresses and in the Enabled field select Yes to enable them. Also in the TCP Port field enter either port 1433 or we recommend port 54212. Also make sure the TCP Dynamic Ports field is blank.
Then scroll down to the bottom of the Properties window and under the IPAll heading make sure that the TCP Dynamic Ports field is blank and the TCP Port field is either 1433 or 54212.
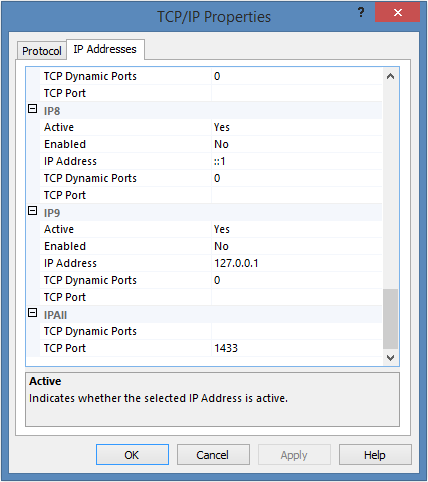
Then click on OK to save the changes.
Click on SQL Server Services and then right click on the SQL Server (Cogitate) option and choose restart.
This will activate the changes made to the Microsoft SQL Server 2017 instance.
You will need to open either port 1433 or port 54212 in your firewall application in order for other computers on the network to access the Cogitate SQL Server instance.
If you need any help with the install process, please contact Cogitate support at 1-866-634-9991 x1 and a support technician will be able to help you.